PLEASE READ BEFORE STARTING!!

Custom coding your website may interfere with apps or other aspects of your website if not done correctly. Please do ALL coding add-ons on a duplicate theme & not your main theme. To do this, go to Online Store > Themes > Click 3 Dots > Duplicate. Once you're happy with the edits you can publish this theme to make it live on your site.

To find where you edit your code (you will need to do this for ALL of the below sections) - Online Store > Themes > 3 Dots > Edit Code.

Other than that, enjoy these Custom Coded Shopify Sections that we have been using for years and spent hundreds of hours perfecting them.

From the team at Go Polar Creative, we wish you all the best in your eCommerce journey!

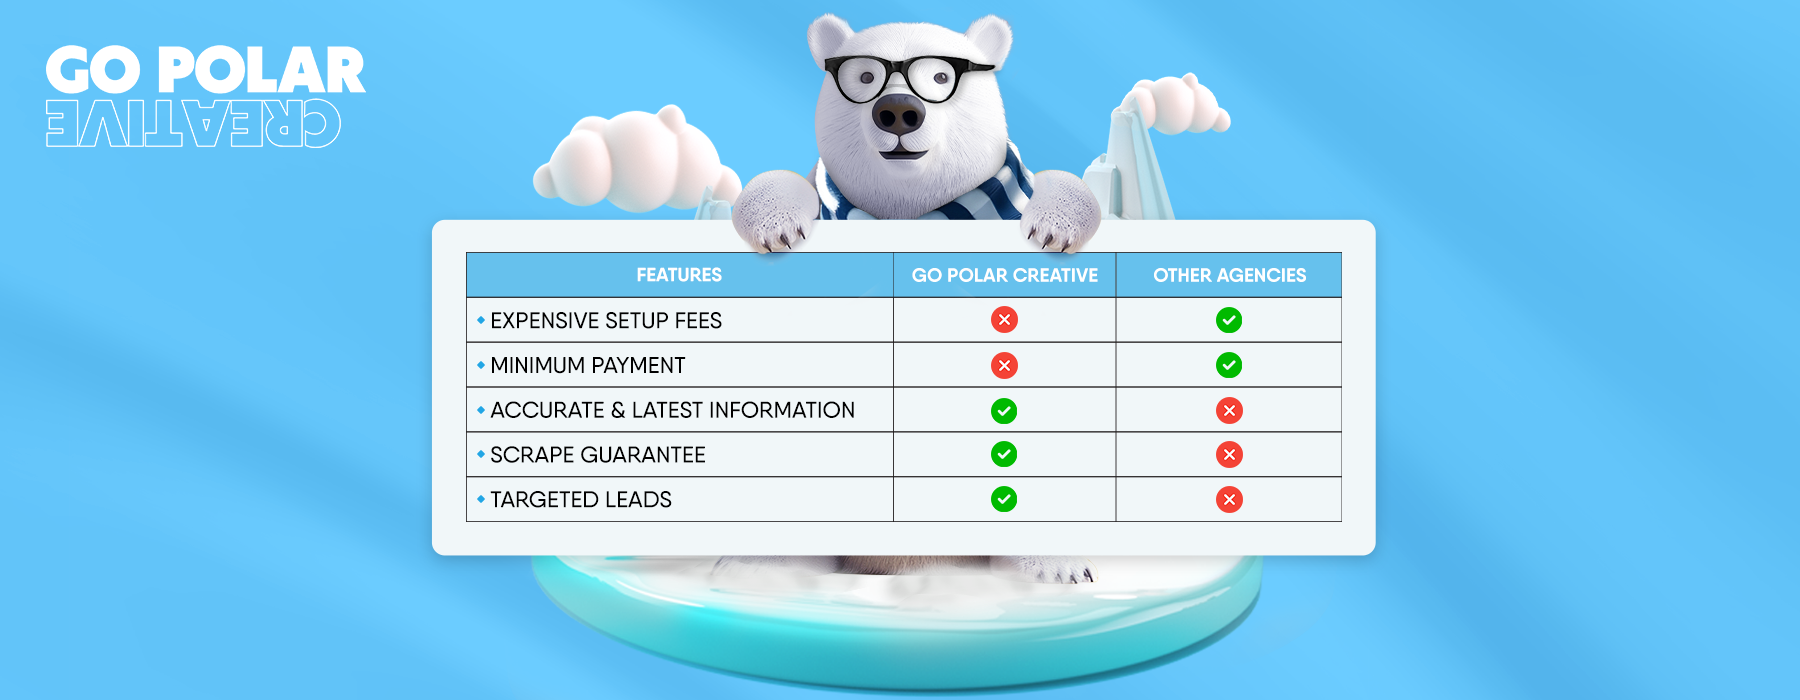
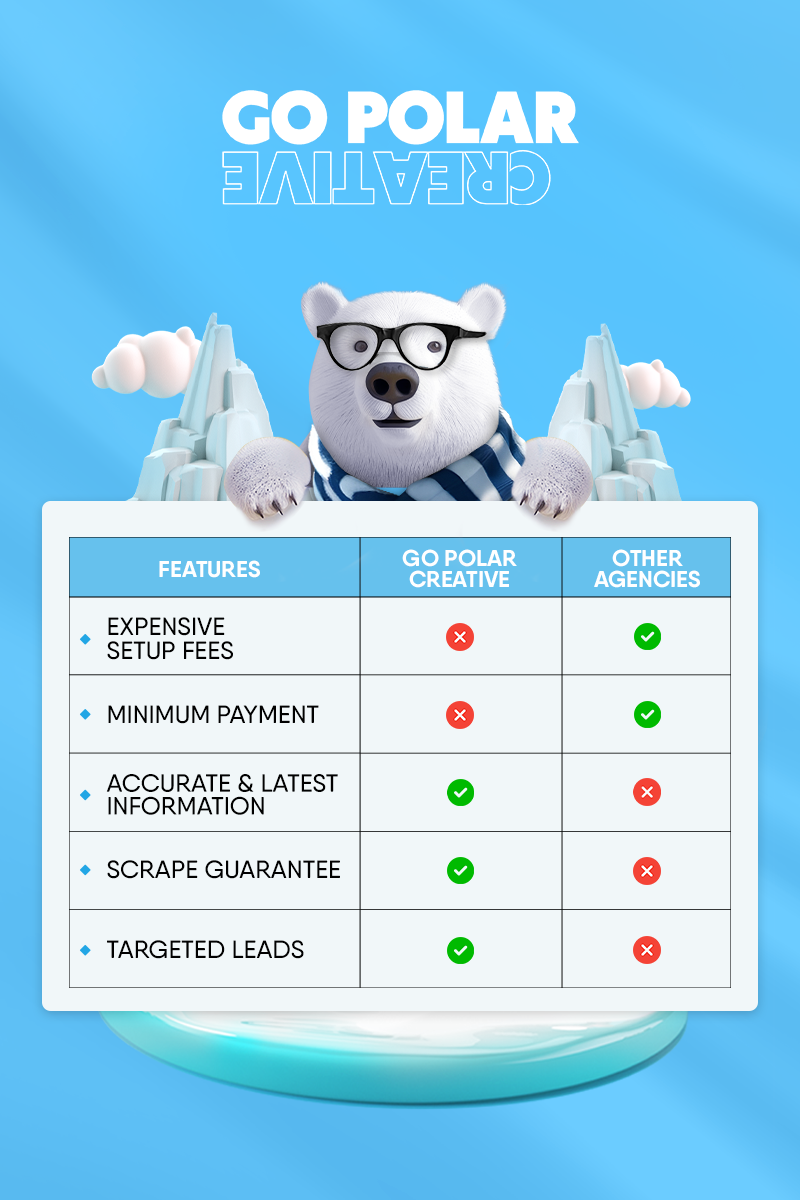
Features
Go Polar
Other Agencies
Feature One
✔️
❌
Feature Two
✔️
❌
Feature Three
✔️
❌
Feature Four
✔️
❌
Feature Five
✔️
❌

instructions for comparison table

    1. Log in to Shopify and go to Online Store > Themes.
    2. Find your theme and click Actions > Edit code.
    3. In the left-hand menu, scroll down and click on the Sections folder.
    4. Click Add a new section.
    5. Name it: static-comparison-table (Do not use spaces).
    6. Delete all default code inside the new file.
    7. Copy and paste the provided Static Comparison Table code from this link (CLICK ME FOR THE CODE) into this section.
    8. Click Save.
    1. Go back to Online Store > Themes > Customize.
    2. On the left-hand panel, scroll down and click Add section.
    3. Search for Static Comparison Table and click to add it.
    4. Click Save.
    1. Click on the newly added Static Comparison Table section.
    2. Upload your company logo – This will appear in the table instead of our business name.
    3. Upload custom tick and cross images to match your brand (optional)
    4. Customize the features:
    5. Click Save.
    1. Go to Online Store > Themes > Edit Code.
    2. In the left-hand menu, click Sections, then open your static-comparison-table file.
    3. Find the following CSS rule:

      .comparison-table .go-polar {
      background: #38B6FF;
      }
    4. Replace #38B6FF with your brand’s colour code.
    5. Click Save.

INSTRUCTIONS FOR STICKY ADD TO CART

This one is a little bit more advanced. BE MINDFUL OF THE FACT YOU NEED TO ADD A SNIPPET, NOT A SECTION
    1. Log in to Shopify and go to Online Store > Themes.
    2. Find your theme and click Actions > Edit code.
    3. In the left-hand menu, scroll down and click on the Snippets folder.
    4. Click Add a new snippet.
    5. Name it: sticky-add-to-cart (Do not use spaces).
    6. Delete all default code inside the new file.
    7. Copy and paste the Sticky Add to Cart code (CLICK ME FOR THE CODE ) into this snippet.
    8. Click Save.
    1. In the left-hand menu, go to the Sections folder.
    2. Find and open main-product.liquid.
    3. Press CTRL + F & Look for {% schema %} (usually at the bottom of the file).
    4. Paste the following code ABOVE {% schema %} and below </product-info>:

      {% render 'sticky-add-to-cart' %}
    5. Click Save.
  • You can modify the background color and text color of the Add to Cart button.

    1. Go to Online Store > Themes > Edit Code.
    2. In the Snippets folder, open sticky-add-to-cart.liquid.
    3. Find this part of the CSS:

      .sticky-add-to-cart button {
      background-color: #30b563; /* Changes colour of the ATC button */
      color: white; /* Changes colour of the text on ATC */
      }

EMBEDED VIDEOS (ADD UGC, TESTIMONIALS, VIDEO TUTORIALS)

instructions for embeded videos

    1. Log in to Shopify and go to Online Store > Themes.
    2. Find your theme and click Actions > Edit code.
    3. In the left-hand menu, scroll down and click on the Sections folder.
    4. Click Add a new section.
    5. Name it: horizontal-video-scroller (Do not use spaces).
    6. Delete all default code inside the new file.
    7. Copy and paste the provided Horizontal Video Scroller code into this section. CLICK ME FOR THE CODE
    8. Click Save.
  • To use videos in this section, you need to upload them to Shopify.

    1. Go to Content > Files.
    2. Click Upload files.
    3. Select your MP4 videos from your computer.
    4. Once uploaded, copy the file URL for each video (you’ll need this in the next step).

    Highly recommend using a website like https://www.freeconvert.com/video-compressor to compress your videos for quick loading. Also, screenshot the cover image and upload as a cover photo. This will show to a customer that the video instant loads.

  • Go back to Online Store > Themes > Customize.

    1. On the left-hand panel, scroll down and click Add section.
    2. Search for Horizontal Video Scroller and click to add it.
    3. In the section settings: Add your video, add up to 3 videos.
    4. Click Save.

Logo 1
Logo 2
Logo 3
Logo 1 Duplicate
Logo 2 Duplicate
Logo 3 Duplicate
Logo 1 Second Duplicate
Logo 2 Second Duplicate
Logo 3 Second Duplicate

instructions for scrolling logos

Advanced if you want more or less than 12 logos.
    1. Log in to Shopify and go to Online Store > Themes.
    2. Find your theme and click Actions > Edit code.
    3. In the left-hand menu, scroll down and click on the Sections folder.
    4. Click Add a new section.
    5. Name it: logo-scrolling-section (Do not use spaces).
    6. Delete all default code inside the new file.
    7. Copy and paste the provided Scrolling Logos code into this section. CLICK ME FOR THE CODE
    8. Click Save.
    1. Go back to Online Store > Themes > Customize.
    2. On the left-hand panel, scroll down and click Add section.
    3. Search for Scrolling Logos and click to add it.
    4. Click Save.
    1. In the Scrolling Logos section settings, click on each Logo image picker.
    2. Upload the logos you want to display.
    3. You can add up to 12 logos by default, but you can adjust this (see Step 4).
    4. Click Save.
  • By default, the section supports 12 logos, but you can change this:

    1. Adjust the Logo Count in Code

    If you want to display fewer or more logos, update this part in logo-scrolling-section.liquid:

    • Locate the following line (twice in the file):
      {% for i in (1..12) %}

      If you want to display 6 logos instead, change it to:
      {% for i in (1..6) %}

    2. Modify the Schema for More or Fewer Logos

    Ensure you update both instances of this line.

    - In logo-scrolling-section.liquid, find the settings section.

    - Each logo has an entry like this:
    {
    "type": "image_picker",
    "id": "logo_12",
    "label": "Logo 12"
    }

    Delete entries if you want fewer logos or copy and paste more if you need extra logos.

    Click Save.

    1. Find the following CSS in logo-scrolling-section.liquid:

    .logo-item img {
    max-height: 60px;
    max-width: 150px;
    }

    2. Increase max-height and max-width for larger logos. (Trial and error until you're happy with the sizing).

    3. Click Save.

Logo

Heading with Logo / Image.

    1. Log in to Shopify and go to Online Store > Themes.
    2. Find your theme and click Actions > Edit code.
    3. In the left-hand menu, scroll down and click on the Sections folder.
    4. Click Add a new section.
    5. Name it: logo-with-heading (Do not use spaces).
    6. Delete all default code inside the new file.
    7. Copy and paste the provided Logo with Heading code into this section. CLICK ME FOR THE CODE
    8. Click Save.
    1. Go back to Online Store > Themes > Customize.
    2. On the left-hand panel, scroll down and click Add section.
    3. Search for Logo with Heading and click to add it.
    4. Click Save.
    1. Click on the newly added Logo with Heading section.
    2. Click Upload Image to add your logo.
    3. Enter a Heading/Statement (e.g., "Premium Quality Since 2020").
    4. Click Save.
  • 1. Changing the Background Color

    By default, the section has a black background. To change it:

    1. Go to Online Store > Themes > Edit Code.
    2. In logo-with-heading.liquid, find the following CSS:

      .custom-logo-heading-section {
      background-color: #000000;
      }
    3. Replace #000000 with your preferred color:
      White: #FFFFFF
      Grey: #F5F5F5
      Blue: #007BFF
    4. Click Save.

    ---------

    2. Adjusting Logo Size
    By default, the logo is 150px wide. To resize it:

    1. In logo-with-heading.liquid, find:
      .custom-logo-heading-section img.logo-centered {
      max-width: 150px;
      }
    2. Change 150px to your preferred size (e.g., 200px).
    3. Click Save.

ANCHOR SCROLL

This is such an underrated feature and is honestly worth hundreds if not thousands of dollars. This button alone has generated more than $200,000 for us as a CTA. By using it in the correct position you can essentially create an impulse decision. Add it after a very impactable statement or image.
    1. Log in to Shopify and go to Online Store > Themes.
    2. Find your theme and click Actions > Edit code.
    3. In the left-hand menu, scroll down and click on the Sections folder.
    4. Click Add a new section.
    5. Name it: anchor-scroll-destination (Do not use spaces).
    6. Delete all default code inside the new file.
    7. Copy and paste the Anchor Scroll Destination code into this section. CLICK ME FOR THE CODE
    8. Click Save.
    1. In the Sections folder, click Add a new section again.
    2. Name it: anchor-scroll-button.
    3. Delete all default code inside the new file.
    4. Copy and paste the Anchor Scroll Button code into this section. (SCROLL DOWN ON THE PREVIOUS GOOGLE DOC AND USE PART 2 OF THE CODE)
    5. Click Save.
    1. Go back to Online Store > Themes > Customize.
    2. First, add the Anchor Scroll Button:
      - Click Add section.
      - Search for Anchor Scroll Button and click to add it.
    3. Then, add the Anchor Scroll Destination:
      - Click Add section again.
      - Search for Anchor Scroll Destination and click to add it.
    4. Move the Anchor Scroll Destination to where you want the button to take the customer to.
    5. Click Save.
  • 1. Changing the Button Text and Color

    You can customize the button text and colors to match your brand.

    1. Go to Online Store > Themes > Edit Code.
    2. In anchor-scroll-button.liquid, find this part:
      <a href="#anchor-scroll-destination"class="anchor-scroll-button">ANCHOR SCROLLING ON SHOPIFY? GAME CHANGER. SHOP NOW! </a>
    3. Change the bold text inside the <a></a> tag to whatever you want.
    4. To change the button color, find this CSS:
      .anchor-scroll-button {
      background-color: #38B6FF;
      }
    5. Replace #38B6FF with your brand’s button color

MOBILE RESPONSIVE HEADER IMAGE

Shopify's default image banner is not mobile responsive. You either have a huge banner on desktop or a small one on mobile. This is the ultimate fix and EVERY SINGLE WEBSITE should have this section on their home page. VERY SIMPLE TO DO
  • Add 2 x “Image Banner” Sections (this is a default section in shopify themes)

  • 1. On the right, scroll down to the Custom CSS tab & add the below code.

    @media screen and (max-width: 750px) {
    .banner,
    slideshow-component {
    display: none;
    }
    }

  • 1. Click on the other Image Banner section that you have not edited.

    2. On the right, scroll down to the Custom CSS tab & add the below code.

    @media screen and (min-width: 750px) {
    .banner,
    slideshow-component {
    display: none;
    }
    }

  • Make 2 new header images.

    Mobile size:
    1080px W
    1600px H

    Desktop size:
    1920px W
    800px H

    Highly recommend adding your desired text in the design stage, don't add it in on Shopify.

Step 1 Image
Step 1
Description for Step 1.
Step 2 Image
Step 2
Description for Step 2.
Step 3 Image
Step 3
Description for Step 3.
Step 4 Image
Step 4
Description for Step 4.

"HOW TO USE"

This is great to visually showcase how to use your product or service. Can also be used as an onboarding process, your imagination is your only limitation!
    1. Log in to Shopify and go to Online Store > Themes.
    2. Find your theme theme and click Actions > Edit code.
    3. In the left-hand menu, scroll down and click on the Sections folder.
    4. Click Add a new section.
    5. Name it: how-to-use-section (Do not use spaces).
    6. Delete all default code inside the new file.
    7. Copy and paste the provided How to Use Section code into this section. CLICK ME FOR THE CODE
    8. Click Save.
    1. Go back to Online Store > Themes > Customize.
    2. On the left-hand panel, scroll down and click Add section.
    3. Search for How to Use Section and click to add it.
    4. Click Save.
    1. Click on the How to Use Section in the customizer.
    2. Upload images for each Step 1 to Step 4.
    3. Enter a Heading for each step (e.g., “Apply the product”).
    4. Write a Short Description for each step.
    5. Click Save.
  • 1. Changing the Background Color

    By default, the section has a light grey background. To change it:

    1. In how-to-use-section.liquid, find this CSS:

      .how-to-use-section {
      background-color: #f9f9f9;
      }
    2. Replace #f9f9f9 with your brand’s color.

Clickable Features

As far as we're aware this section only works on the DAWN & DEBUT theme. It's great to showcase product features, services etc.

INSTRUCTIONS FOR CLICKABLE FEATURES

  • Log in to Shopify and go to Online Store > Themes.

    Find your theme and click Actions > Edit code.

    In the left-hand menu, scroll down and click on the Sections folder.

    Click Add a new section.

    Name it: clickable-feature (Do not use spaces).

    Delete all default code inside the new file.

    Copy and paste the provided Clickable Feature Section code into this section. CLICK ME FOR THE CODE

    Click Save.

    1. In the Assets folder, click Add a new asset.
    2. Name it: clickable-feature.js.
    3. Copy and paste the provided JavaScript code into this file. (Further down the same google doc)
    4. Click Save.
    1. In the Assets folder, click Add a new asset.
    2. Name it: clickable-feature.css.
    3. Copy and paste the provided CSS code into this file. (Further down in the same doc)
    4. Click Save.
    1. PLEASE FIND STEP 4 AT THE VERY BOTTOM OF THE GOOGLE DOC.
    1. Go back to Online Store > Themes > Customize.
    2. On the left-hand panel, scroll down and click Add section.
    3. Search for Clickable Feature Section and click to add it.
    4. Click Save.
    1. Click on the Clickable Feature Section in the customizer.
    2. Click Add Feature to create clickable tabs.
    3. For each feature:
      - Enter a Tab Title (e.g., "Feature 1").
      - Choose a Media Type (Image or Video).
      - Upload an Image or Enter a Video URL. (Works best as a 600x600px square image.
    4. Repeat this for up to 4 features.
    5. Click Save.

What Our Customers Say

★★★★★

This is the best product I have ever used!

John Doe, Company Inc.

★★★★★

This is the best product I have ever used!

John Doe, Company Inc.

★★★★★

This is the best product I have ever used!

John Doe, Company Inc.

★★★★★

This is the best product I have ever used!

John Doe, Company Inc.

★★★★★

This is the best product I have ever used!

John Doe, Company Inc.

★★★★★

This is the best product I have ever used!

John Doe, Company Inc.

★★★★★

This is the best product I have ever used!

John Doe, Company Inc.

★★★★★

This is the best product I have ever used!

John Doe, Company Inc.

★★★★★

This is the best product I have ever used!

John Doe, Company Inc.

★★★★★

This is the best product I have ever used!

John Doe, Company Inc.

★★★★★

This is the best product I have ever used!

John Doe, Company Inc.

★★★★★

This is the best product I have ever used!

John Doe, Company Inc.

★★★★★

This is the best product I have ever used!

John Doe, Company Inc.

★★★★★

This is the best product I have ever used!

John Doe, Company Inc.

★★★★★

This is the best product I have ever used!

John Doe, Company Inc.

INSTRUCTIONS FOR SCROLLING TESTIMONIALS

    1. Log in to Shopify and go to Online Store > Themes.
    2. Find your theme and click Actions > Edit code.
    3. In the left-hand menu, scroll down and click on the Sections folder.
    4. Click Add a new section.
    5. Name it: testimonials-scroll (Do not use spaces).
    6. Delete all default code inside the new file.
    7. Copy and paste the provided Testimonials Scroll code into this section. CLICK ME FOR THE CODE
    8. Click Save.
    1. Go back to Online Store > Themes > Customize.
    2. On the left-hand panel, scroll down and click Add section.
    3. Search for Testimonials Scroll and click to add it.
    4. Click Save.
    1. Click on the Testimonials Scroll Section in the customizer.
    2. Click Add Testimonial to create a new customer review.
    3. For each testimonial:
      - Enter a Name/Company (e.g., "John Doe, Company Inc.").
      -Write your customers Testimonials Text
    4. Repeat this for up to 8 testimonials.
    5. Click Save.
  • By default, the scroll speed is 20 seconds per full loop on desktop. To change it:

    1. Go to Online Store > Themes > Customize.
    2. Click on the Testimonials Scroll Section.
    3. Adjust the "Desktop Scroll Speed" slider.
    4. Click Save.

PARALLAX IMAGE SCROLLING

instructions for parallax scrolling

    1. Log in to Shopify and go to Online Store > Themes.
    2. Find your theme and click Actions > Edit code.
    3. In the left-hand menu, scroll down and click on the Sections folder.
    4. Click Add a new section.
    5. Name it: parallax-banner (Do not use spaces).
    6. Delete all default code inside the new file.
    7. Copy and paste the provided Testimonials Scroll code into this section. CLICK ME FOR THE CODE
    8. Click Save.
    1. Go back to Online Store > Themes > Customize.
    2. On the left-hand panel, scroll down and click Add section.
    3. Search for Parallax Scroll and click to add it.
    4. Click Save.
  • Upload a Desktop Image – This image will appear on desktop with parallax scrolling.

    Upload a Mobile Image – This image will appear only on mobile (taller format).

    Add a Heading & Body Text (Optional)

    Click Save.

INSTRUCTIONS FOR IMAGE GALLERY

    1. Log in to Shopify and go to Online Store > Themes.
    2. Find your theme and click Actions > Edit code.
    3. In the left-hand menu, scroll down and click on the Sections folder.
    4. Click Add a new section.
    5. Name it: image-gallery (Do not use spaces).
    6. Delete all default code inside the new file.
    7. Copy and paste the provided Testimonials Scroll code into this section. CLICK ME FOR THE CODE
    8. Click Save.
    1. Go back to Online StoreCustomize.
    2. Click "Add Section".
    3. Look for "Image Gallery" under "Custom".
    4. Click Add and start uploading images.
  • Use this text to share the answer to the question with your customers.

MORE SECTIONS

Shopify limit the amount of content on 1 page, click the button below to see the rest of the content.